Category: Health

  • Stretch Therapy – Program 10 Recap (Day 76)

    Stretch Therapy – Program 10 Recap (Day 76)

    Date of stretch: July 31, 2024

    Equipment used: slider for hamstring lunge, chair, wall, yoga block

    Total exercise duration: about 20 minutes

    Thoughts: Hands down my favorite program so far. Used to hate hamstring stretches. But now that I’m able to target the muscles without experiencing sciatic nerve pain behind my knees — thanks to the adjustments — I love the muscle stretch sensation since for many years (as long as I can remember) I was unable to engage them, let alone feel them.

    Summary: I’m curious what’s the difference between the first and third hamstring exercises in terms of what muscles they target since they seem to both generally target the hamstring? Do they target different parts of the hamstring? Second question: what muscles are weak / not engaged that prevent me from pulling my heels in closer to my pelvis during the Tailor Pose? I can grip my ankles with my hands and physically drag my feet in closer to pelvis so seems like I have the range of motion but lack strength in one or more muscles. Finally, during the hamstring lunge, the bottom of my back foot started cramping and although I panicked, I paused and remained in the position (instead of rushing and backing out) and after taking a few deep breathes, the cramp spasms vanished and I was able to carry out the rest of the exercise.

    Hamstring

    • Feels like a more accessible Elephant Walk stretch
    • More tightness on the right hamstring
    • The Contract and Release (C/R) felt very strong and big sensation (not uncomfortable)

    Tailor Pose

    • Question: What muscles are weak / not engaged that prevent me from pulling my heels in closer to my pelvis? I can grip my ankles with my hands and physically drag them closer so seems like I have the flexibility but lack the strength
    • I think I am engaging the “back hip” muscles but that whole general area feels like the glutes (lack of granularity on my side)

    Wall

    • Want to spend more time on this since it feels good on the inner thighs
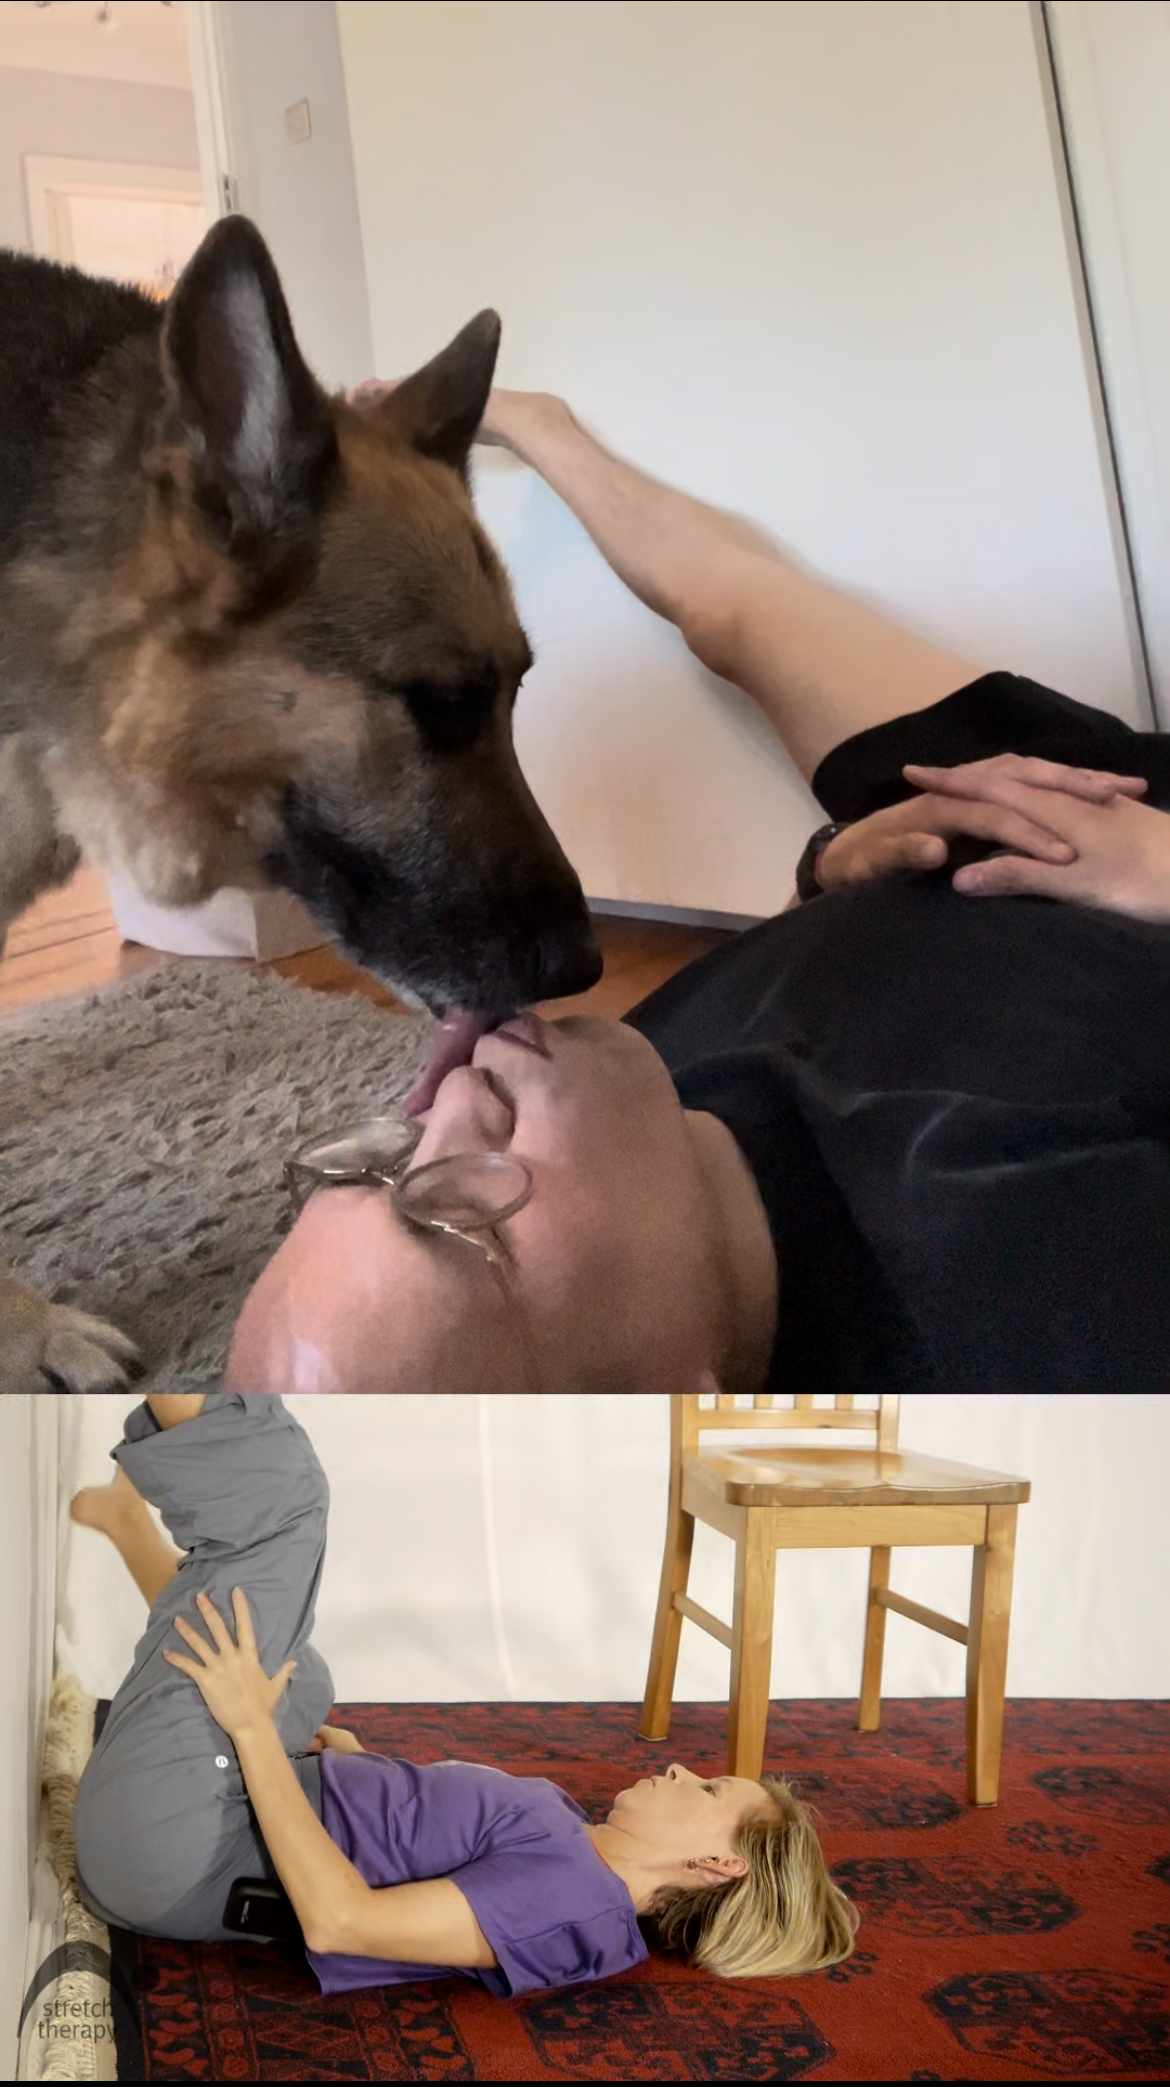
    Hamstring lunge

    • Right foot cramped when pulling back. Had a moment of panic and instead of rushing out of the position, I paused and took a couple deep breaths and the cramp slowly melted away and I didn’t push the stretch any further
    • Question: does this hamstring lunge target different parts of the hamstring then the first one (the chair elephant walk like exercise)
    • This exercise made me produce sweat and definitely increased my temperature
  • Stretch Journal – Monday July 01, 2024

    I’ve entered the 6th week of my stretching journey. In today’s program (12), we focused on the following muscles: calves, quadriceps, and ankles.

    Throughout this journey, I’m semi-regularly tracking my progress because I have this vision — a very clear image (which almost brings me to tears thinking about it) — of me moving gracefully, without pain: the source of pain turning into source of pleasure. This vision is somewhat far into the future, anywhere between 2-5 years (by then, my age will be between 38-41).

    Notes

    • Total duration of today’s program about 19-20 minutes
    • Equipment relied on was 1) a mat to support the knees 2) chair for the squat and 3) bolster to adjust the seiza position, the Japanese kneeling position
    • The focus was on the calves, quadriceps, ankles
    • Listened to my wise mind and added much needed adjustments like both sitting on the bolster, resting my ankles on top of a folded up sweater since ankles could not sustain being pressed against hardwood floor. In the past, I avoided adjustments, perceiving myself as weak. But I’ve abandoned that idea, welcoming adjustments to create an environment that’s conducive for relaxing into the stretch
    • Today I experienced another instance of actually enjoying stretching, no longer trying to “search for” or “experience” pain. Instead of forcing myself through the pain, pushing through the pain. I’m minimizing and avoiding it all together. Those previous strategies (e.g. no pain no gain), do not serve me in my quest of becoming a supple leopard.
    • I’m continuing to open up to finding alternative exercises at varying intensities that work for my body
    • Eye opener experience for me is (and continues to be) tilting the pelvis (or as they say “tucking the tail”), which avoids tweaking my lower back during certain exercises like the quadriceps stretch
  • Burning fat with intermittent fasting? 3 weeks of monitoring body ketones

    Burning fat with intermittent fasting? 3 weeks of monitoring body ketones

    I began my intermittent fasting (i.e. time restricted eating) journey just over 3 weeks ago and since the beginning, I’ve been measuring, tracking, monitoring both my glucose and ketone body levels. Collecting these data points require pricking my fingers with a lancet and feeding small blood samples into the monitoring devices.

    Although the process of drawing blood is somewhat painful, annoying and sometimes inconvenient, these minor drawbacks are worth the trade off: developing a deeper understanding of my body. An additional downside of this routine blood sampling is that it can be somewhat cost prohibitive: each ketone test strip costs about $1.00 and because I collect about 8-12 blood samples per day, the total cost per week ranges anywhere between $50-75 dollars.

    Nutritional Ketosis

    With the test strips, I now know when my body enters nutritional ketosis, a metabolic state when one’s body produces an elevated amount of ketone bodies (i.e. acetoacetate, acetone, beta-hydroxybutyrate). Nutritional ketosis is an indicator of lypolysis — a process in which bodies burn fat for fuel, a desirable state when trying to lose weight.

    So … how do you know your body is in nutritional ketosis?

    Nutritional ketosis can be defined as 0.5 to 3.0 millimoles per liter (mmol/L) of beta-hydroxybutyrate being present in blood. So if the meter reports a value within that range, then you are burning fat!

    A not-so-strict ketogenic diet

    My body is still able to transition into nutritional ketosis despite not adhering to a strict ketogenic diet, which is defined a very low carbohydrate or low carbohydrate diet, consuming between 30-50g or consuming less than 150g per day, respectively. Instead of adding more constraints into my life, I’m (more or less) just restricting my eating window, following what is known as a 16:8 intermittent fast — 16 hours window of fasting, 8 hour of eating (also known as post-postprandial state).

    Not following a strict ketogenic diet does lower the probability of entering nutritional ketosis. I had initially thought that right off the bat, my body would fairly quickly (maybe within three or four days) enter nutritional ketosis at the tail of my fasting window. But according to the data I’ve collected, I’ve discovered that normally, throughout the day, my ketone body levels hover anywhere between 0.1 and 0.4 mmol/L — below the nutritional ketosis range.

    Four discrete instances of nutritional ketosis

    1. 0.5 mmol/L – Playing pickle ball early in the morning while in the fasted state
    2. 0.8 mmol/L  – Playing tennis during while in the fasted state
    3. 0.9 mmol/L – Extending fast to about 30 hours
    4. 2.5 mmol/L – Extending fast to about 36 hours
  • On developing an intuition of glucose levels

    On developing an intuition of glucose levels

    Over the last two weeks, I’ve measured my glucose levels over 150 times. Starting on July 11, I’ve pricked the tips of left-hand fingers with an annoying lancet, producing anywhere between .5 – 3.0 micro-liters of blood each about once every hour.

    Glucose monitoring equipment
    Lancet, test strips, and measuring device

    Why?

    Because I introduced intermittent fasting (also known as time restricted eating) into my routine and I wanted to gain an intuition for my blood sugar levels, good or bad. Seriously — it’s all about data collection and better understanding my body.

    Hourly tracking of glucose levels using Contour Next

    About 2.5 weeks ago, I stopped by the local local Rite-Aid located around the corner from my house, and purchased a glucose monitor — along with hundreds of test strips (by the way, DO NOT buy the test strips at Rite-Aid since they totally rip you off — the same test strips on Amazon cost 70% less: .30 cents per strip vs $1.60) to measure my sugar levels.

    Acceptable blood sugar ranges

    Before embarking on this self-experiment of data collection, I had no clue as to what sugar levels are considered healthy or unhealthy. An acceptable level depends on whether you are fasting or not (i.e. postprandial state) and glucose measurements (at least in the U.S.) are measured in milligrams per deciliter (mg/dL).

    CDC Blood sugar levels
    Acceptable blood sugar levels according to the CDC

    Fasted State

    When fasting, your blood levels should fall below 99 milligrams per deciliter (mg/dL). Between 100 and 125 indicates Prediabetes. Above 125 ? That’s a sign of diabetes.

    Postprandial State

    When not fasting (i.e. postprandial state), the acceptable windows slide up. After eating, your levels should hover below 140. Between 140 and 199 — prediabetic. 200 or higher? Diabetic.